I wanted to share how to use custom Things in the Eureka Doom editor. It took me quite a few attempts to get figure this out as it is definitely not a case of drag and drop or browse/include a resource directory... The aim is to include a new custom monster into your project such that it correctly appears in the Things browser, in the 2D and 3D preview and in the corresponding Thing properties, and is correctly usable. Note that I am going to describe the process for including in an expanded PK3 project.
There are a few actions we need to take to do this.
- Extract the Thing's components from the resource WAD
- Namespace the components in expanded PK3 directory structure
- Add DECORATE import file to root
- Create resource WAD with example sprite
- Link everything togeher with Eureka custom thing config file
It is a bit more envolved than adding custom Things to UDB, but once it is set up, it is easy to extend. I will use the Dark Cardinal as it's cool.
>>> GET EXAMPLE PROJECT <<<
Extract the Thing's components from WAD
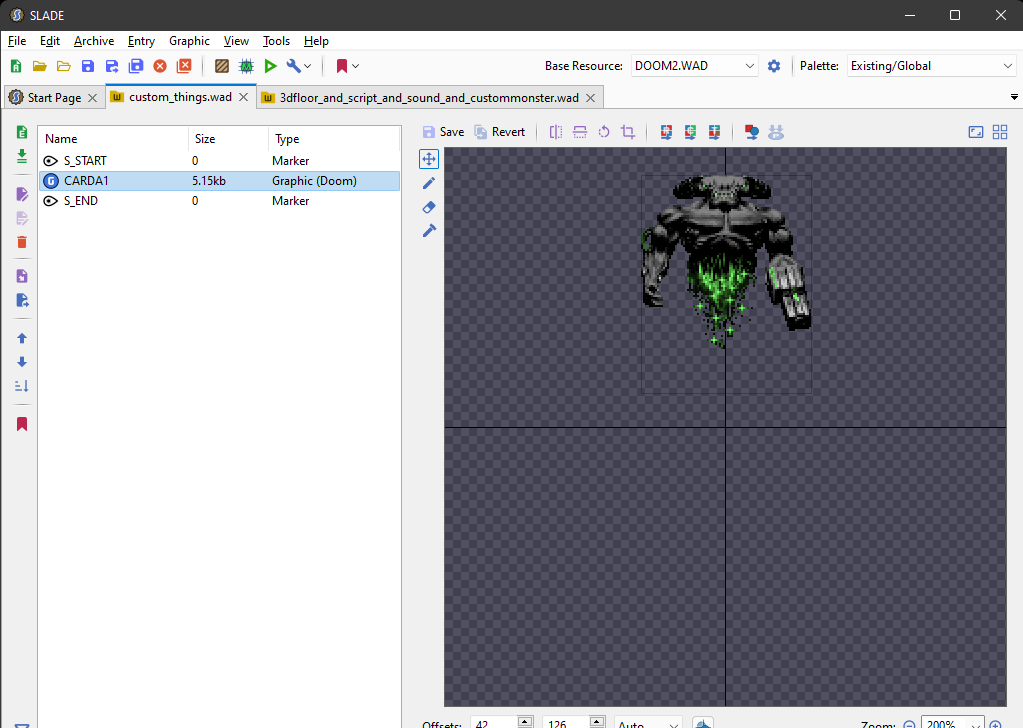
Download to a suitable location, unzip and open the WAD in Slade3:
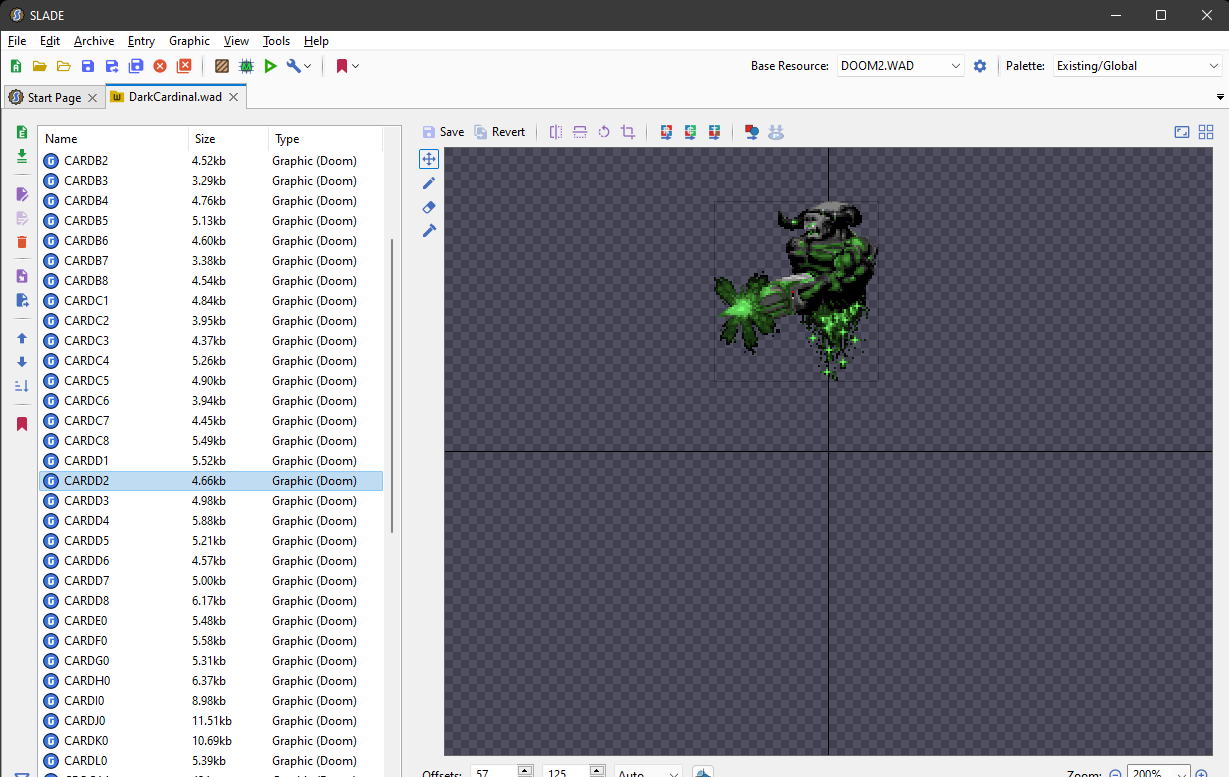
The main thing to note here is the DECORATE lump defining behaviour. The other lumps are graphics that represent the frames of the sprite animation. Other custom monsters may also include sound, brightmaps, ACS (compiled and source) and other lumps as well.
Namespace the components in expanded PK3 directory structure
The full namespace list for the .pk3 archive format is specified in the ZDoom WIKI. For the Dark Cardinal, we will only need the exploded sub-directories for /actors, /maps and /sprites, so create a directory hierarchy like so:
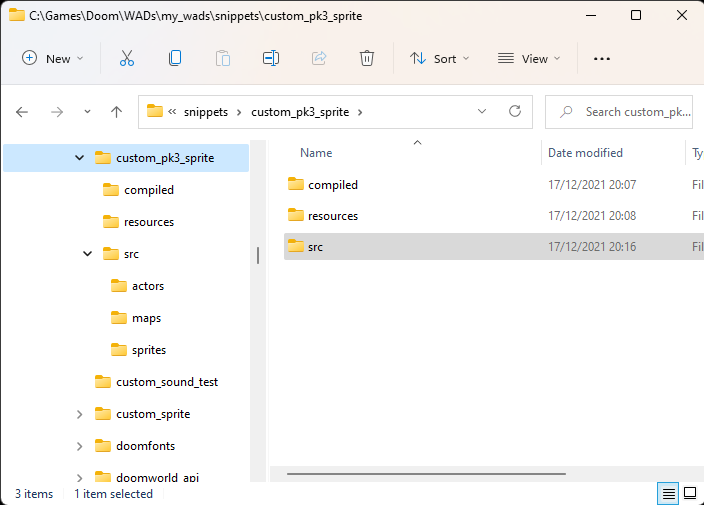
Create subdirectories
/actors
/maps
/sprites
inside the /src directory - we will place the extracted lumps and a test map in these directories. Note that I will describe a PK3 project setup elsewhere.
Extract DECORATE lump
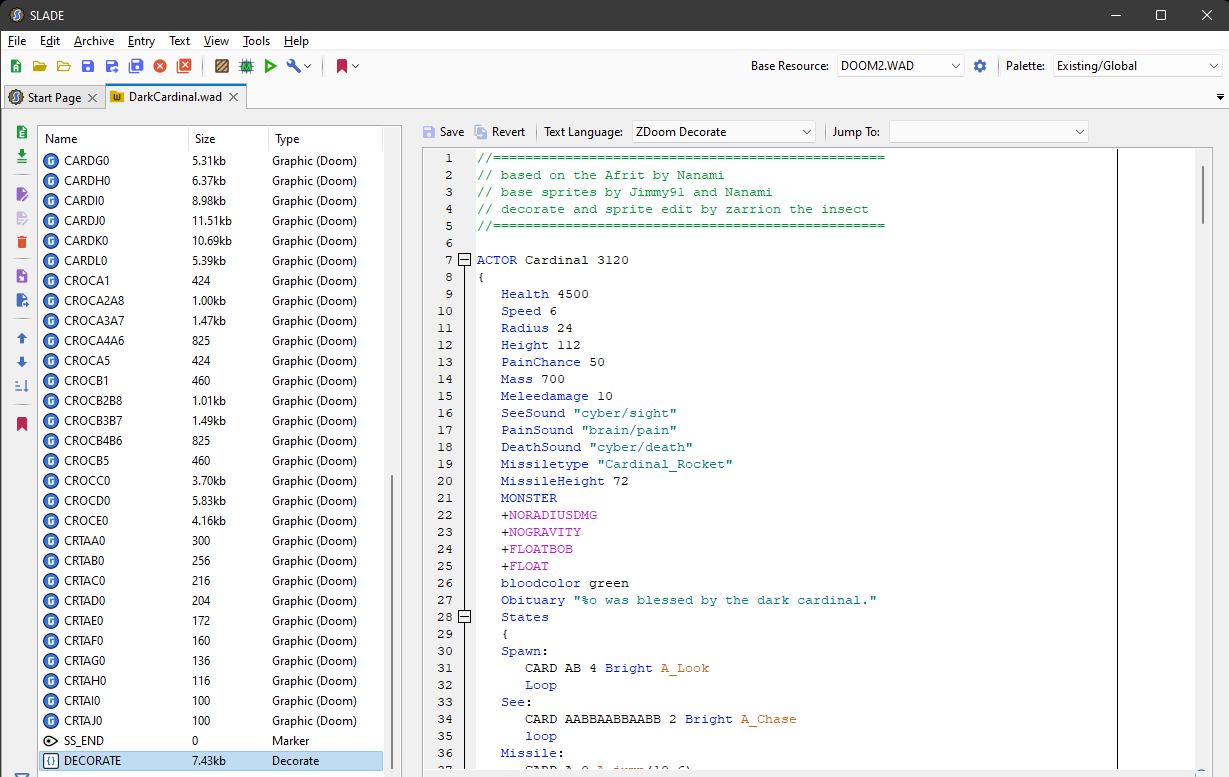
In Slade3, highlight the DECORATE lump
And right-click on this entry:
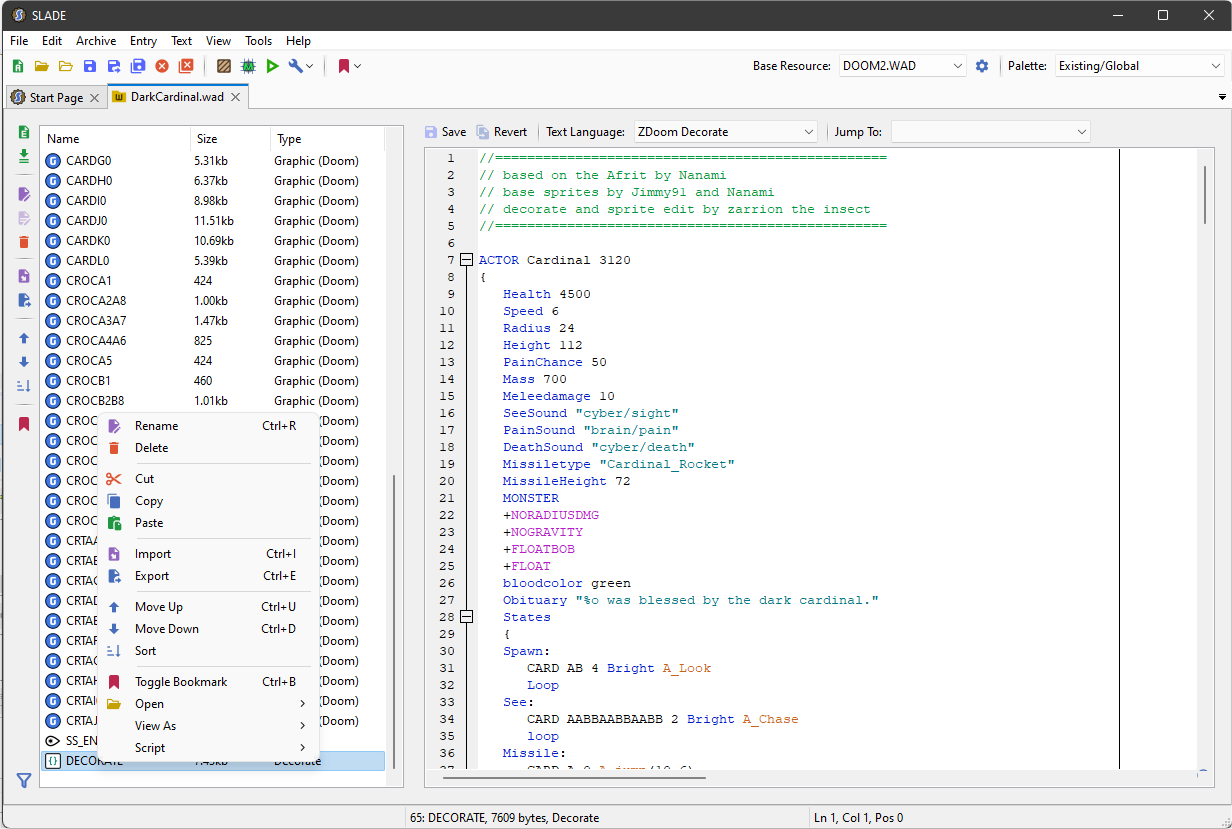
And select the export option from the menu. In the resulting 'save-as' dialog, browse to the /src/actors/ directory of your empty PK3 structure and save it there. Note the code at the top of the DECORATE file:
ACTOR Cardinal 3120
{
   Health 4500
   Speed 6
   Radius 24
   ...
and in particular the editor number - in this case 3120. This is important, and you may find that some actor DECORATE code does not have one, and in such cases , a unique (to your project) number must be added.
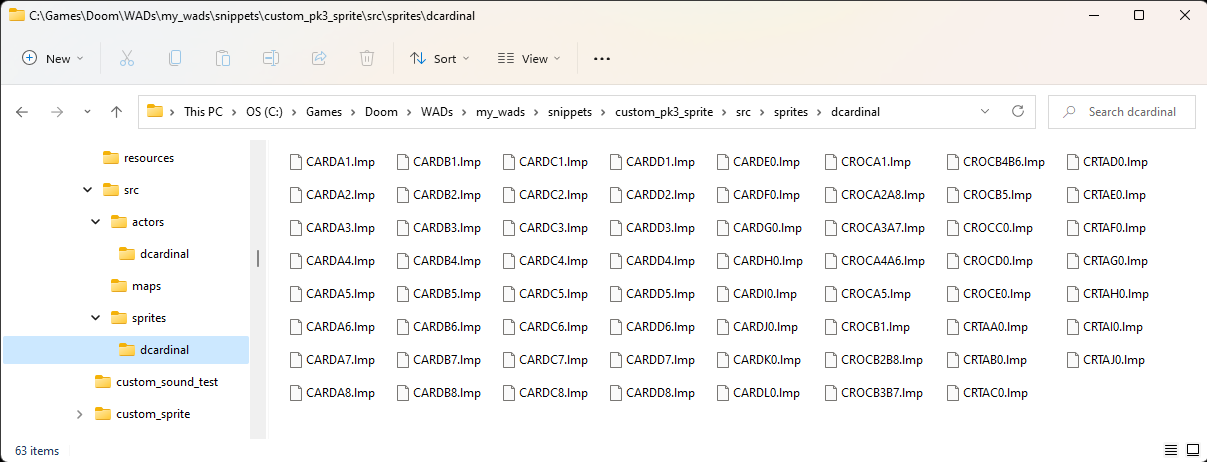
Extract sprite lumps
Do a similar process for the remaining graphic lumps, and export them from Slade3 into the /src/sprites/ directory. You should end up with all the graphics lumps and the DECORATE lump in the corresponding namespaces in your exploded directory structure. If you plan to use many custom sprites, I suggest adding sub-directories to each namespace for each custom monster, and this is what I have done here.
Add DECORATE import file to root
The DECORATE file(s) in the /actors namespace are not read directly by the sourceport - mainly because they may be found in any subdirectory within this namespace or may not actually be called 'DECORATE.*'. Therefore, we must place a special DECORATE file (it must be called 'DECORATE.txt', or simply 'DECORATE') that specifies the file(s) inside the /actors namespace to import as custom monster definitions. Create a file in the root of the /src directory like so:
#include "Actors/dcardinal/DECORATE.txt"
Note the include path matches the location that we saved the Dark Cardinal decorate code.
Create a test map
We now have enough info to make a basic working map inside our PK3 directory structure. So, in Eureka editor, go ahead and create a new project and specify the map location as the /maps subdirectory of the /src directory. Make sure you use a wad filename of 'map01.wad', and IWAD=Doom2, Source=ZDoom and map type=Hexen as the project settings. Leave the default square room with player starts as it is. Note that the map WAD name can be anything, but that would require a MAPINFO to map map slot with map name. In this case, 'map01.wad' is recognised by GZDoom without a MAPINFO.
Now, we can add a new Thing - say a health bonus, like so:
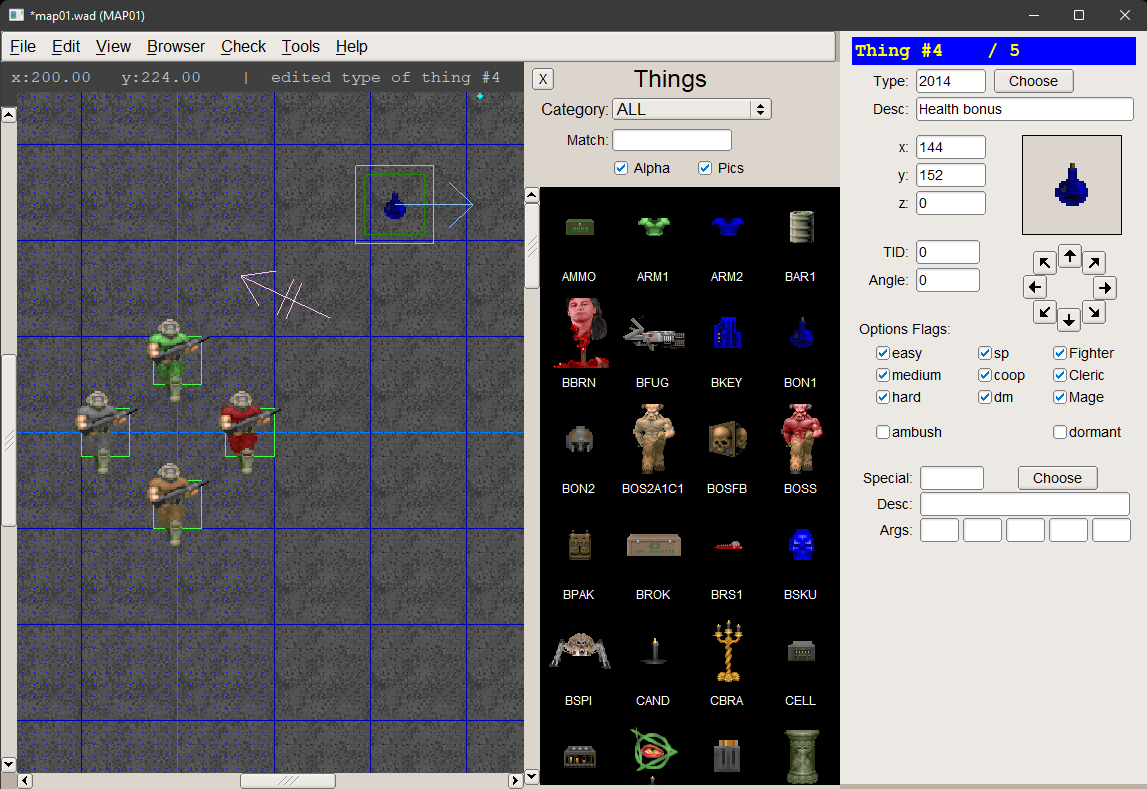
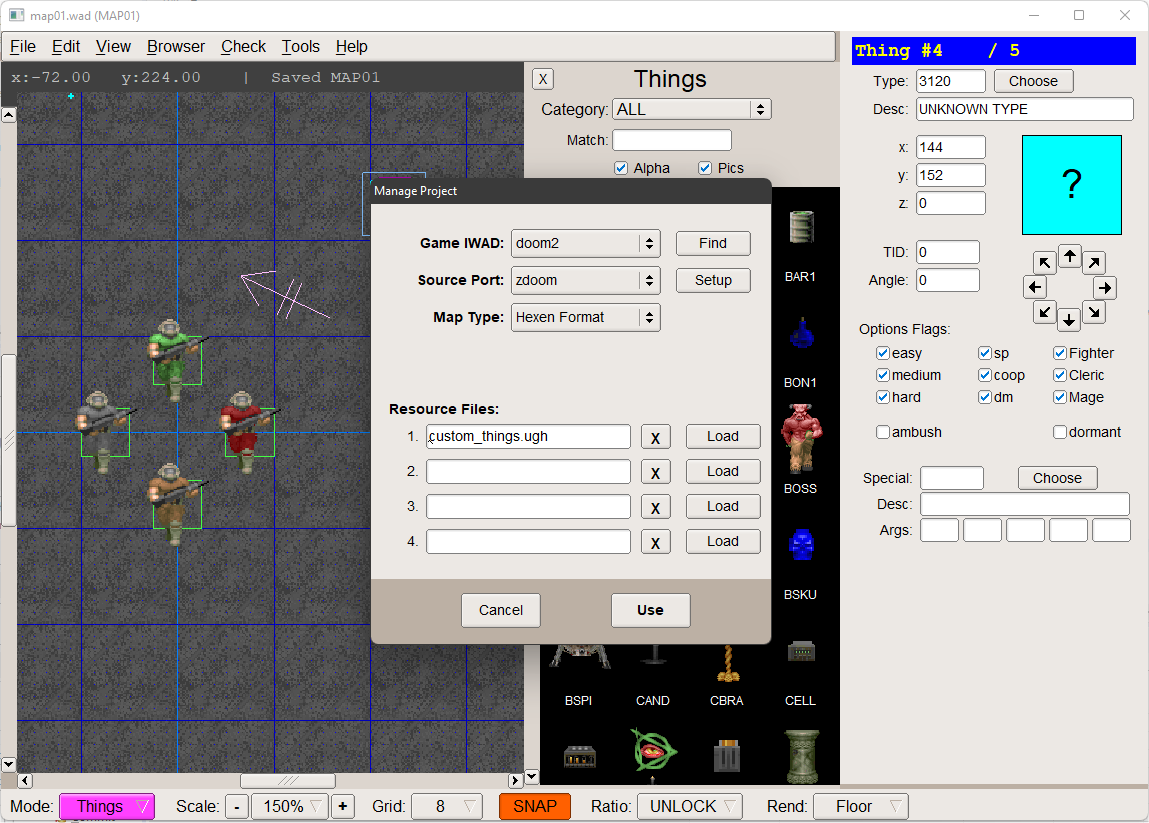
Note the 'Type' in the top right corner? This is the editor number of the current Thing. If we simply replace this with the editor number for the Dark Cardinal we got from the DECORATE code (3120), the PK3 should technically work now, though Eureka does not know how to display an unknown Thing in the interface at the moment:
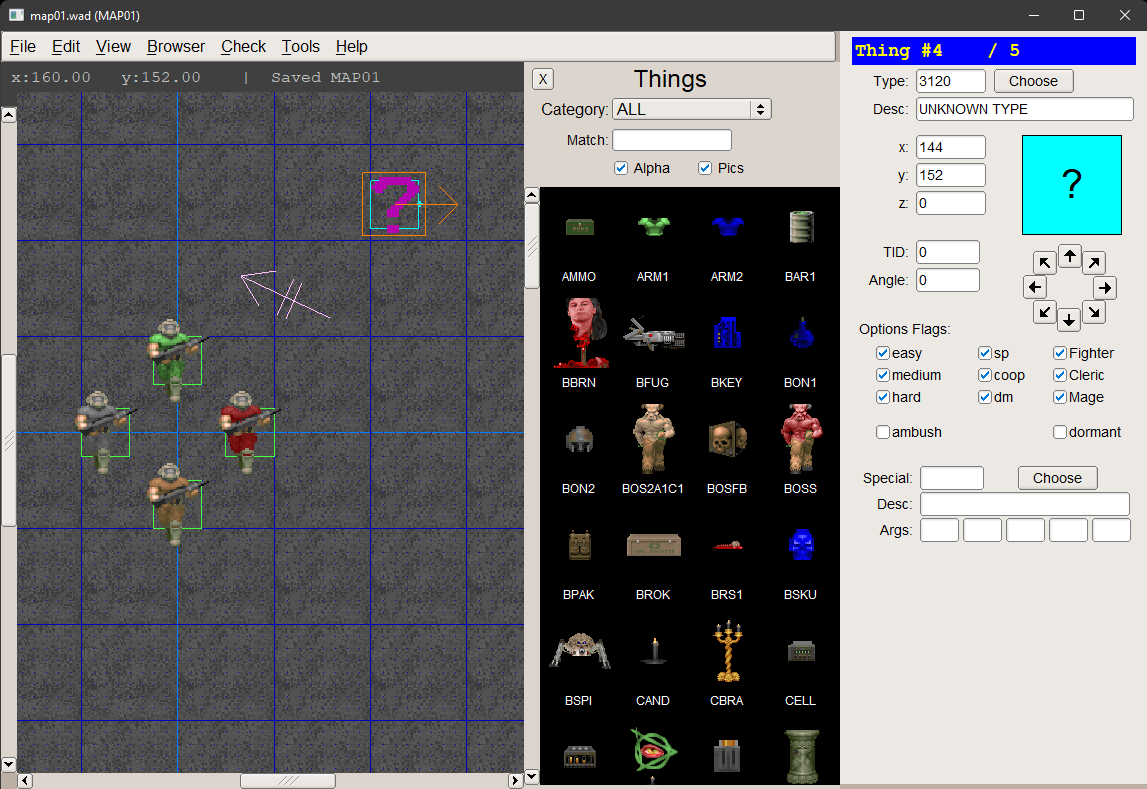
You can test the map by loading the /src directory into GZDoom - you should see the Dark Cardinal...The final two steps are to set up Eureka to know about the custom Thing and to nicely display the custom Thing sprite so you can use it as you would one of the default Doom2 Things.
Tell Eureka about the custom thing
Eureka makes extensive use of configuration files both internally and for customisation. These are text files that have the file extension of .ugh.
This is where the /resources directory comes in. We need to give the Eureka project some information that will allow it to locate the custom Thing and display its metadata
in the Eureka editor interface. We do this with a custom config file. This is simply a text file that contains information about what it is.
Create a file called 'custom_things.ugh' and add the following text:
# # Definition of thing groups # Format is : thinggroup# # Custom thinggroup q 66C "Custom monsters" # # Definition of things # Format is : thing # # should be NULL for things without any sprite # # can contain these letters: # i : invisible # c : on ceiling # l : lit up # n : non-blocking # v : can exist in void-space # t : teleport dest (can overlap certain things) # thing 3120 q - 30 NULL "Dark Cardinal" #
This is mostly comment and instructions, which I have left in place from the original files I used as reference. The key thing is the last line defining the new custom Thing in a format that Eureka understands. Note the NULL entry for the sprite. We don't yet know what value this entry should be, so substituting for NULL for now is sufficient. Once we have this defined, we need to tell the Eureka project about it so we can use it.
Select 'File/Manage Project':

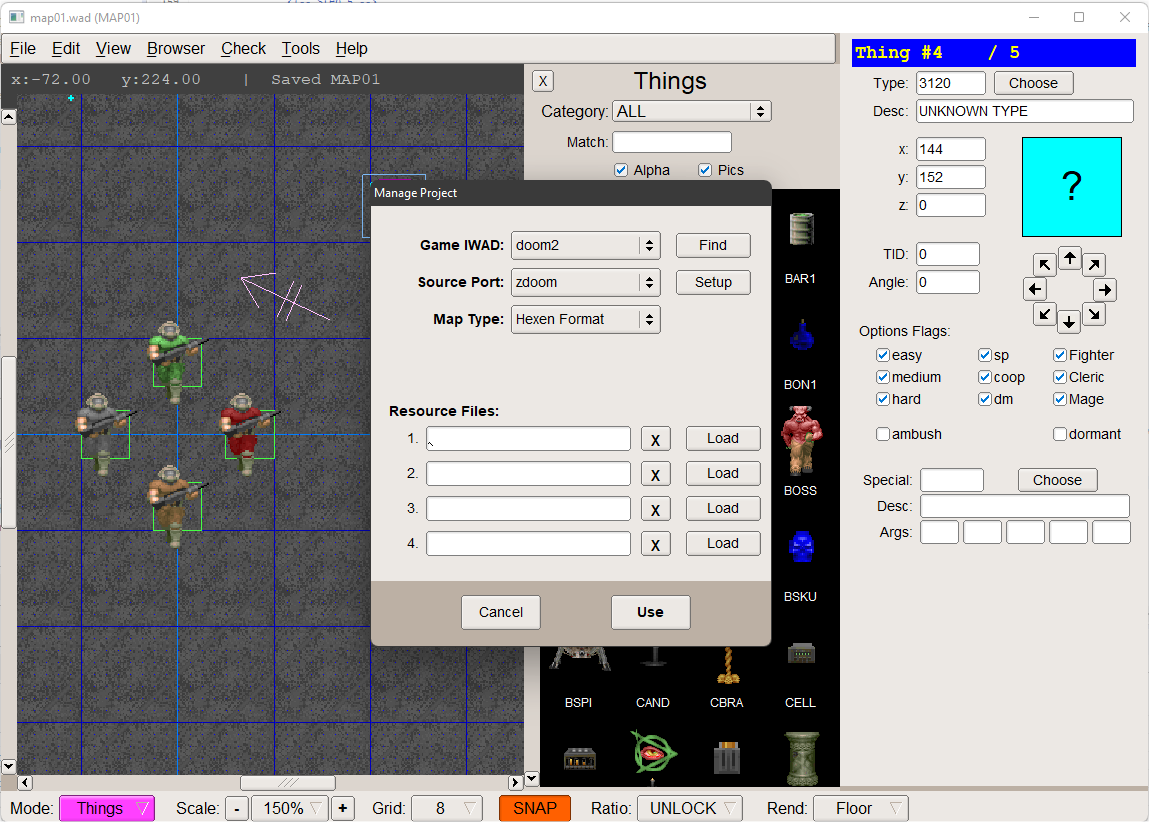
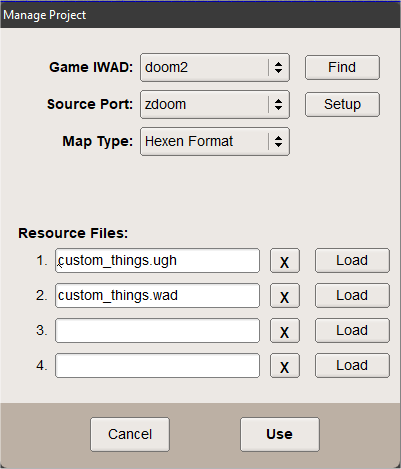
Click the first 'Load' button and browse for the 'custom_things.ugh' file we created in the previous step above:
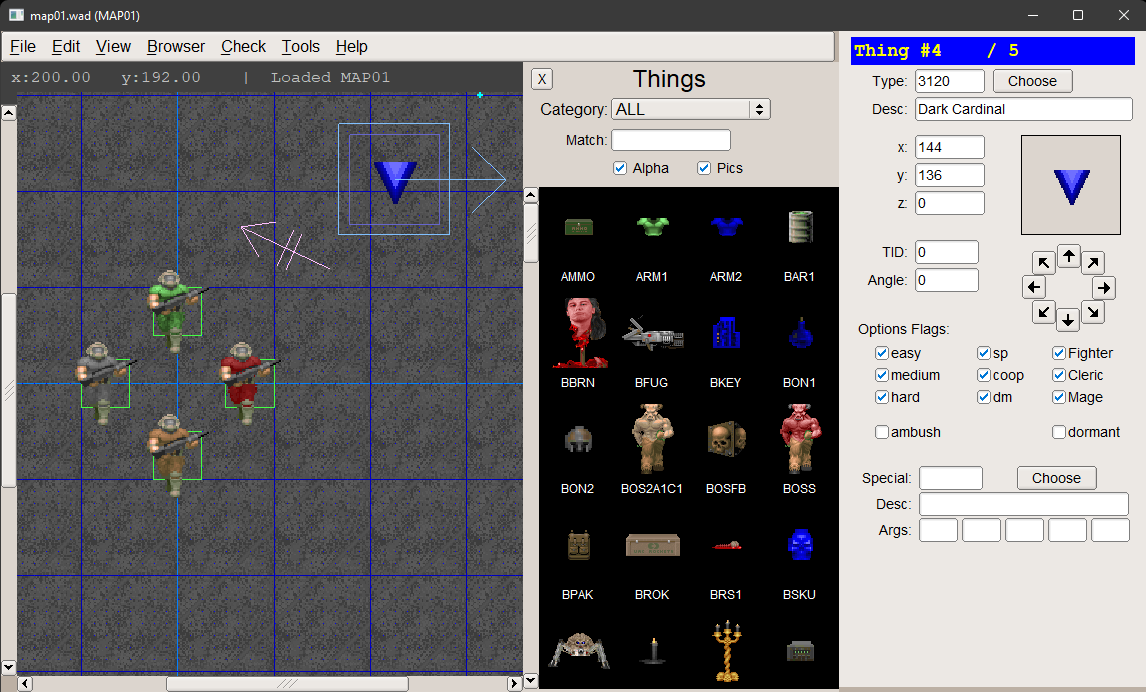
And click 'Use'. Refresh or restart Eureka, and you will see the the question mark icon change to a blue triangle, and the properties form will show the defined name.
However, the Thing browser does not contain a new icon for the new Thing - even a generic one - so we cannot yet actually use it! This is all tied together with the final steps...
Create resource WAD with example sprite
In order to properly display and use this custom sprite in the editor, we need to create a WAD that contains an appropriate sprite frame image and update the custom_thngs.ugh to include this additional information.
Now we can create a new resource WAD in Slade3 and add a suitable sprite frame image between sprite markers. Copy the sprite name! Save this WAD to the /resources directory of the project.
Finally! we can include this new resource. We need to update the custom_things.ugh file and include the WAD with the sprite as another Project resource.
Update the .ugh file to include the sprite frame instead of the NULL value:
... #can contain these letters: # i : invisible # c : on ceiling # l : lit up # n : non-blocking # v : can exist in void-space # t : teleport dest (can overlap certain things) # thing 3120 q - 30 CARDA1 "Dark Cardinal" #
And add the resource WAD i the same way as for the .ugh file:
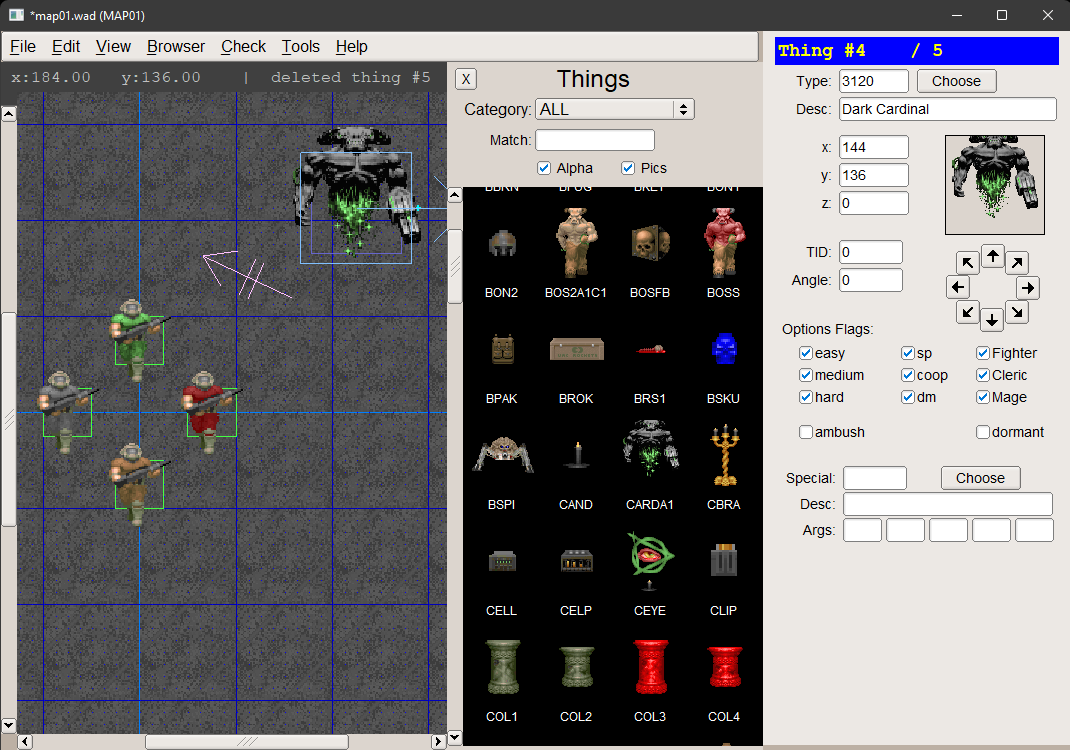
And on refreshing Eureka, you should see the new Thing fully integrated into the project:
References
Useful links:
- Dark Cardinal
- ZDoom WIKI
- editor number at zdoom wiki
- MAPINFO at zdoom wiki
- Doomworld thread - Custom sprite display in Eureka interface - A version of this tutorial on Doomworld
And some threads from Doomworld that greatly helped me figure this stuff out. Thanks to @Printz and @andrewj for helping me out with these.
- Doomworld thread - Eureka editor: Custom Things UI?
- Doomworld thread - Eureka: defining custom monster sprite/icon in UI